OVERVIEW
Mountain West Services (MWS) is committed to providing highly trained personnel for all Non Destructive Examination (NDE) services in today’s oil and gas industry. Non Destructive Examination is a group of techniques used to evaluate the properties of a material, component or system i.e. Vessels, tanks, piping. This examination does not alter the material and can be done both online or offline. The most common techniques practiced by MWS are Ultrasonics, Magnetic Particle, Liquid Penetrant and Magnetic Flux Leakage. The integrity of components in today’s industry is a vital aspect in regard to workers safety and clients everyday operations.
CORROSION SURVEYS
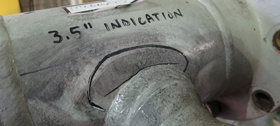
MWS NDE division offers the service of monitoring both new and existing equipment. MWS NDE personnel have been trained to identify critical areas that require monitoring for each specific type of equipment. These areas are then marked out and labeled on the equipment/components and used as a reference point for future ultrasonic examinations to compare short/long term corrosion rates. Other valuable information such as Tmin and recommended retirement dates can be calculated based upon the ultrasonic findings.
The NDE division also offers CAD and data entry services to its clients. These services compliment the corrosion survey in that all isometric drawings, digital photos of vessels and data are inputted into a program and made viewable to the client on the MWS website.
SHUTDOWNS AND MAINTENANCE
MWS NDE division offers all conventional NDE services for both small/large scale shutdowns. We also offer specialized services via subcontracted personnel.
ULTRASONIC TESTING (UT)
Ultrasonic testing uses high frequency sound energy to conduct examinations. It can be used to detect flaws in components and welds as well as measuring thickness to determine material loss due to corrosion, erosion or pitting. Material characteristics can also be evaluated during these examinations. Reference standards are used as a mean to ensure equipment functionality and provide similar examination criteria to that of the component being examined. Ultrasonic testing is a widely used technique in today’s oil & gas industry to ensure component, piping and system integrity. (i.e.Vessels, tanks, piping).
ADVANTAGES
- Ultrasonic testing can be used as an examination technique while the equipment/component is in or out of service. This advantage makes it a very cost effective technique to ensure integrity while operational status is not disrupted to the client.
- It can be used to detect, locate and evaluate defects/flaws that other NDE methods are not best suited for.
- High frequency sound energy allows for high penetrating power for detection of defects/flaws located deep within a given material.
- High sensitivity for the detection of smaller flaws within the material of interest.
- Access to one side of the inspected material only.
- Equipment is very portable, battery operated and intrinsically safe.
- Minimal part/material preparation is needed.
- Compliments other NDE techniques i.e. MFL tank floor scanning.
LIMITATIONS
- Surface roughness, material geometry or extremely thin materials make examination difficult to perform.
- Coarse grained materials i.e. cast iron are difficult to inspect due to low sound transmission and high signal noise.
- Linear defects/flaws that are located parallel to the sound beam may go undetected.
MAGNETIC PARTICLE (MT)
Magnetic particle testing is used for finding surface/near surface defects/discontinuities in ferromagnetic materials. It uses a magnetizing force which induces a magnetic field within the material of interest. If the magnetic field flowing through the material encounters a defect/discontinuity, a leakage field occurs. While this magnetic field is induced within the material, ferrous iron particles are applied to the material via a wet or dry suspension. Defects/discontinuities that are orientated perpendicular to the magnetic flux lines present the greatest external presence. The introduction of the magnetic field can be introduced in several different ways:
- Permanent magnets
- Flowing electrical current through the material via a yoke (AC or DC)
- Flowing electrical current through the material via a coil of wire that wraps around the material or a central conductor running near the material.
Two types of magnetic fields can be introduced within the material. The first type is longitudinal which runs parallel to the long axis of the material and the second type is circular which runs circumferentially around the perimeter of the material.
ADVANTAGES
- Can detect both surface/near surface defects/discontinuities.
- Considered a low cost NDE method compared to other methods.
- Indications are visible directly on the material surface.
- Very portable.
- Very good sensitivity to fatigue cracking, hydrogen induced cracking & stress corrosion cracking.
- Can examine materials/parts with irregular shapes/geometry.
LIMITATIONS
- Depth detection of defects/discontinuities cannot be evaluated without supplemental NDE methods.
- Can only be effective in ferromagnetic materials.
- Surface must be accessible and clean and free of oil, grease, scale etc.
- Can only detect surface/near surface defects/discontinuities.
LIQUID PENETRANT (PT)
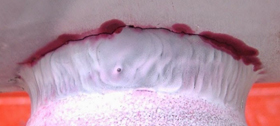
Liquid penetrant testing is used for finding surface defects/discontinuities in non-porous materials. This technique can be applied to ferrous and non-ferrous materials, although for ferrous materials magnetic particle examination is often used for its subsurface detection capabilities. This technique uses the properties of capillary action in that the liquid will be drawn into a clean surface breaking defect/discontinuity. After a period of time called the “dwell time”, the excess surface penetrant is removed and a developer is applied. Any surface defects/discontinuities will have the penetrant drawn from them to reveal its presence within the material being examined.
ADVANTAGES
- Can be used on a wide variety of materials.
- Considered a low cost NDE method compared to other methods.
- Indications are visible directly on the material surface.
- Very portable.
- Very good sensitivity to defects/discontinuities.
- Can examine materials/parts with irregular shapes/geometry.
LIMITATIONS
- Depth detection of defects/discontinuities cannot be evaluated without supplemental NDE methods.
- Surface must be accessible and clean and free of oil, grease, scale etc.
- Can only detect surface defects/discontinuities.
MAGNETIC FLUX LEAKAGE (MFL)
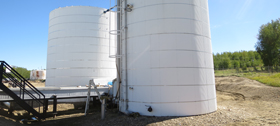
Magnetic flux leakage testing is used for detection of corrosion/pitting in steel structures/materials. Large steel structures are prone to corrosion/pitting that sometimes may not be visible to the eye. The magnetic flux leakage technique uses a magnetic field to detect corrosion/pitting in that it saturates the ferromagnetic material of interest. If there is corrosion/pitting present within the saturated area, the field will “leak” and be detected by the scanner. This is a very common technique used to examine tank floors with special interest on the soil to tank floor interspace. This is a very common place to find corrosion on tank floors.
ADVANTAGES
- High sensitivity to corrosion/pitting in ferromagnetic materials.
- Can examine large areas of material within a short time frame.
- Minimal setup time required.
- Very portable.
- Requires access to only one side of the material of interest.
- Yields reliable and qualitative tank floor assessments.
LIMITATIONS
- Not a quantitative technique for identifying remaining wall thickness.
- Can only be effective in ferromagnetic materials.
- Requires supplemental Ultrasonic testing to verify where areas of wall loss/interest are found.
- Cannot differentiate between soil side and product side defects.
- Poor surface conditions e.g. scale, debris, roughness and certain coatings may limit the integrity of the examination.


